Network Repository has been made to solve problems that occur when more designers are included in the project design. Project documentation should follow certain rules, prescribed by company policy or the higher instances (public institutions). Document templates, various configurations and other important data were usually stored on the networks disc, to be available to all that concerns. However, this way is not appropriate when there are a lot of users and a large amount of data – simultaneous access causes problems and there is lack of access control. User access rights could not be defined. Those problems could lead to data loss, that can cause serious problems in project design and further operations. Also, the data redundancy could occur which causes time losses and decreases control.
Those problems were solved by Network Repository module. The module enables storage of:
· General settings
· Configurations (labels, previews, longitudinal sections, cross sections, user data, intersections, automatic invert definition..) - all configurations that can be stored to disk repository as well
· Configuration files (pump characteristics, import rules..)
· Other files important for the configurations (blocky, symbols)
· Catalogues
The users connected to the network could download the data stored on Network repository so they can use it in their work. The user can acces Network repository by the user name and password.
The users can upload their configurations, catalogs and other files on the Network repository so the other users connected to the network can download it and use it.
This way the problem of configuration upload and replacement has been solved – it is much easier to upload or replace certain configuration, as well as manage user's access since every user has it's own user account with its access level. It is easier to protect the files as well – all the catalogs, files and configurations are stored on the server computer and are available all the time to all users connected to the network. The possibility of the data loss is reduced – the data can't be deleted if Network repository is active. Since the data is stored on the same place, it is much easier to create backup as well.
Network repository can be installed on any computer and no license is required. However, the user that uses Urbano should have active license for module Network Repository 8.0 in order to access Network repository for download or upload files, catalogs or configurations.
Network repository installation file is separate than Urbano installation. It can be installed on the same computer where Urbano 8 is installed, but this is not neccessary. What is neccesary is to instal Network repository on the computer that will be available to all the computers in the network. It can be server computer, but it is not the requirement. Regarding other network computers, the computer with Network repository installation will play the role of the provider – server computer. Therefore it will be futher called Network repository Server – NRS.
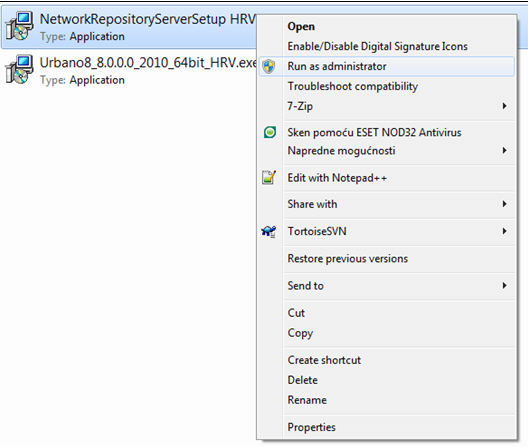
There is only one NRS installation file for all languages. When the installation begins, the user should choose the language of the installation. NRS installation has to be started as administrator (Windows 7).
|

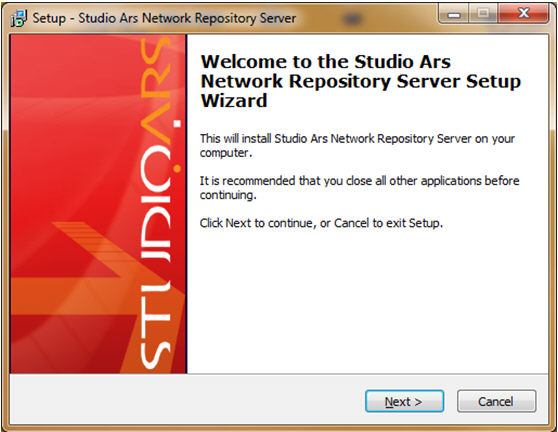
The installation is similar to Urbano inatallation:
|
NRS software contains integrated web server for administartion purposes – setting basic parameters, user administation, editing basic parameters for stored catalogs and configurations. The rest of the NRS functionalities can be accessed using Urbano application.
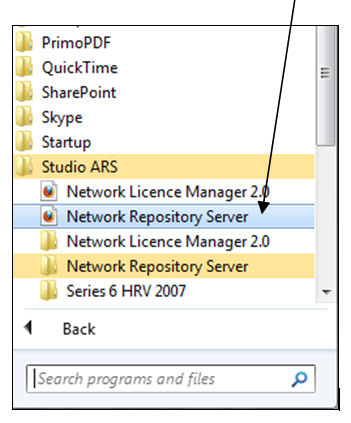
To open NRS user interface on the server computer, click on START – All programs,a and find Network Repository Server:
|
NRS web page will open:

|
|
||||
After login, following page will appear:

First when installed, NRS contains no configurations, catalogs or any other elements. To save first configurations,
catalogs and other items, it is necessary to open Urbano and log in as administrator. Open Urbano and select following command:
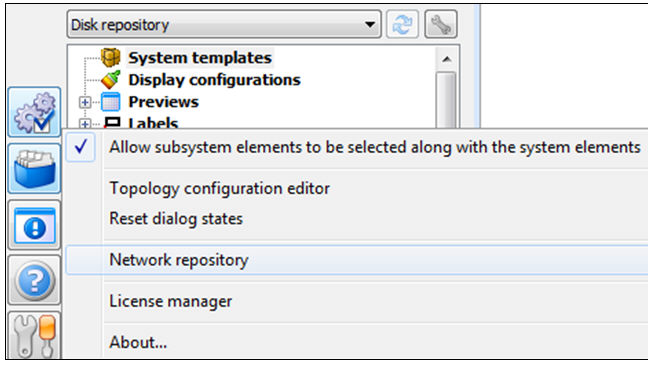
Following dialog will appear:
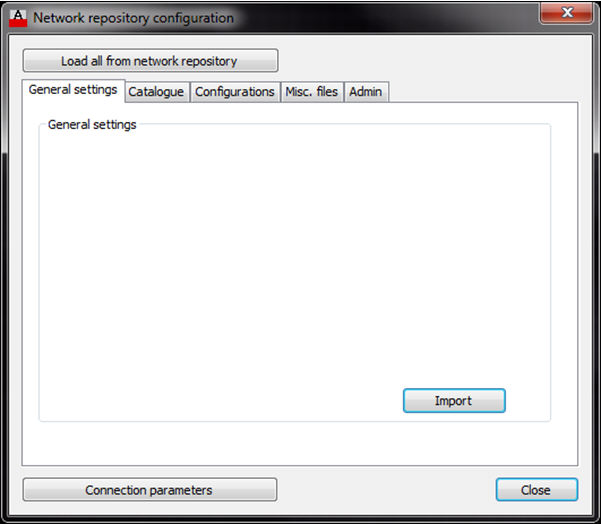
Click on connection parameters:
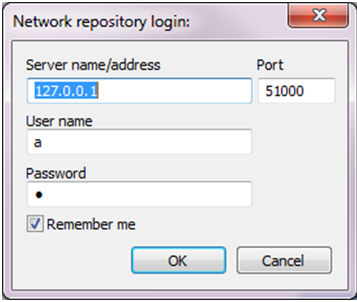
Server name/address – input server name or IP address
Login as ADMIN – user name: a ; password: a. (Read here how to set user name and password.)
Admin tab
|
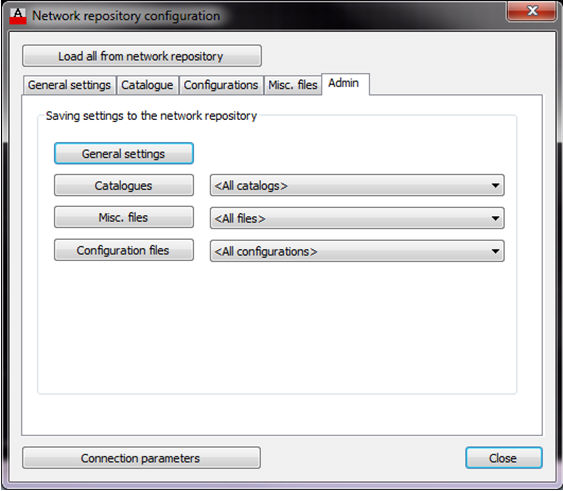
General settings – click on this button to load General settings from the local computer to NRS. After that, this configuration will be availabe to all users that have access to NRS.
Catalogues – choose option <all catalogs> or some specific catalog from the pull-down list, and click on the button Catalogues to load it from the local computer to NRS.
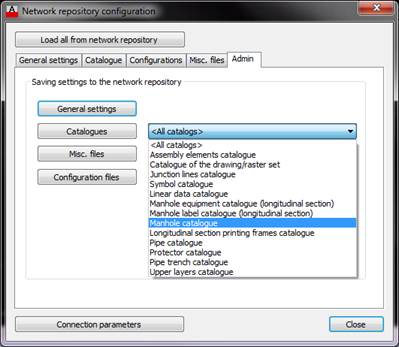
Misc. Files – choose either <all files> or some specific type of files from the pull-down list and click on Misc files button to load it from the local computer to NRS:
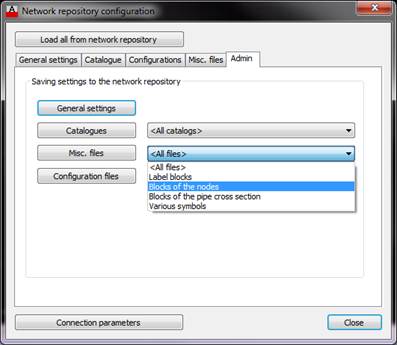
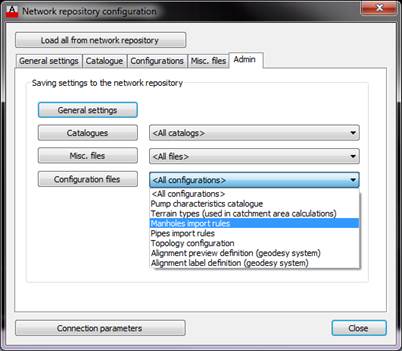
Configuration files - choose either <all configuration> or some specific type of configuration from the pull-down list and click on Configuration files button to load it from the local computer to NRS:
When the user uploads certain item to the NRS, item information are also available – author of the item (user account) and which Urbano version the item was created with. This information prevents overwriting new items (made in new version, i.e. Urbano 8.1) with the old ones (made in older version, i.e. Urbano 8.0).
It is strongly recommended for all users in the network (that use NRS) to have the same Urbano version, otherwise the users with the older versions won’t be able to perform all the actions.
It is possible to add arbitrary number of users, edit the users, delete them and edit their access levels.
![]() - add
new user
- add
new user
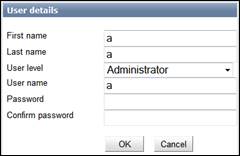
Following dialog will open, where user information and access level should be set User, Power user, Administrator:

![]() - edit
existing user
- edit
existing user
![]() - remove
existing user – the action can’t be undone
- remove
existing user – the action can’t be undone
Catalogues can be loaded to NRS only using the Urbano application.
Using NRS via web user interface allows restricted items management. Full control over the catalog items, configurations and other files can be achieved only using Urbano application. For example, it is possible to edit or erase certain item using NRS web interface, but it is not possible to erase whole catalog group or the whole catalog.
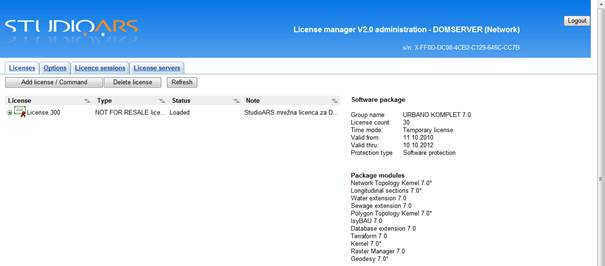
Configurations can be loaded to NRS using Urbano application. It is possible to edit or erase certain configuration using NRS web user interface, but it is not possible to erase them all. More of how to load configurations to NRS in the chapter Client computer NRS access.
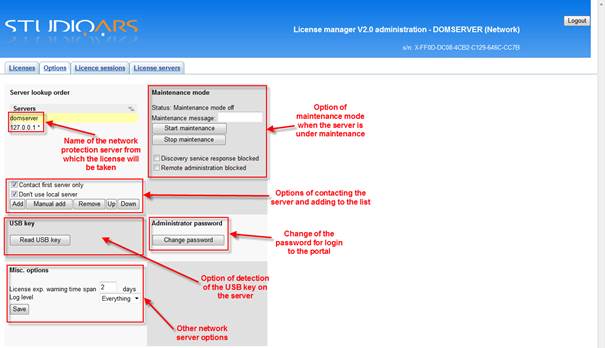

Server IP addresses – IP address has to be set as the address of the computer in the network where NR has been installed (NRS). If server has only one IP address (static ?), it is enough to type “0.0.0.0”, the network will automatically recognize the address of the server (provider).
If the server computer has more network cards, it will have more IP addresses, so the providing address must be set.
Repository server port – communication port between NRS and client computers – port 51000 is the default value set by the installation process. It can be changed. If the port is changed manually, the user has to make sure that the new port is set as open. If the port is not open, the communication with the NRS will not be possible.
Application name – the application web user interface will open with this name: http://127.0.0.1:64738/application_name. When NR is installed, the shortcut to http://127.0.0.1:64738/repository will appear in the START menu.
Administration port – communication port between NRS and client computers in the network. – port 64738 is the default value set by the installation process. It can be changed. If the port is changed manually, the user has to make sure that the new port is set as open. If the port is not open, the communication with the NRS will not be possible.
These settings are important for setting the connection of client computers with NRS. Read more about it here.
The client computer can access NRS if there is active license that contains module Network Repository 8.0, and if connection settings are set correctly. In that case the user wlll be able to download catalogs, configurations and other items from NRS, or upload it (depending of the account access level).
Open Local license manager. Set the appropriate license that contains module Network Repository 8.0, the license can be local or network.
Open Urbano application and select following command:
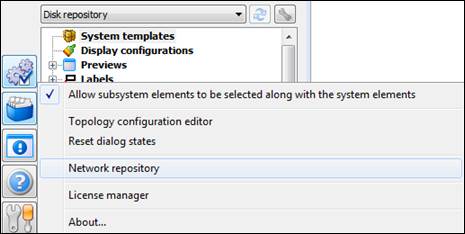
Following dialog will appear:

Click on connection parameters:
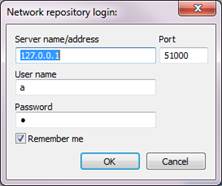
Server name/adress – input server name or IP adress
Login as ADMIN – user name: a ; password: a. (Read here how to set user name and password.)
User name and password must correspond with the user account made using NRS web user interface.
For example, if there is user added on NRS, user name: “User56”, password: U56, those user name and password should be set in this dialog to set the connection of the client computer with NRS.
The user can have three access levels:
User
Power User
Administrator
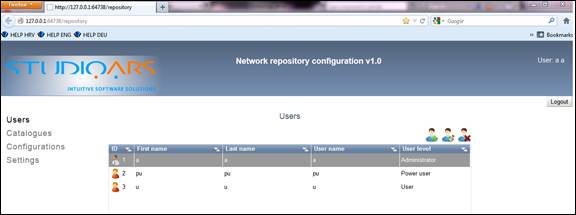
User rights are shown in the table below:
|
USER ACTION |
Administrator |
Power User |
User |
ITEM OPERATIONS |
Add new items |
x |
x |
|
Edit items |
x |
x |
|
|
Erase items |
x |
x |
|
|
Download items |
x |
x |
x |
|
USER OPERATIONS |
Add new user |
x |
|
|
Edit existing user |
x |
|
|
|
Erase existing user |
x |
|
|
|
Edit own user account |
x |
x |
x |
|
|
Edit NRS settings |
x |
|
|
Every user can log in on NRS web server with its own user account (user name and password) and perform available actions, according its rights.
Urbano Workspace has been upgraded regarding NRS as well. Until now the user could save his configurations to Disk repository. Now the user can choose active repository – Disk repository or Network repository.
|
|
REMARK: If the client computer doesn’t have the license for the module Network repository 8.0, only Disc repository will be available.
Configurations of labels, previews, longitudinal sections, cross sections, user data, import and export data, system templates and all other elements can be copied to Network repository using “drag&drop” method, the same way as it can be done with Disk repository.
All users can copy configurations from Network repository to their local computers. Those users with higher level of access can add new configurations to NR, edit them or delete them. More about access rights read here.
It is possible to upload catalogs to NRS or download it from NRS to the client computer:
Click on Catalog export button and following dialog will appear:
Export destination
should be chosen –Network repository. Select group or item to export,
and press the button ![]() . Selected
item(s) will appear on the right side of the dialog. Click OK.
. Selected
item(s) will appear on the right side of the dialog. Click OK.
Catalogues can be imported the same way from NRS. Click on the button Catalog import.
Similar dialog will appear. Choose the destination – NR:
Catalog group
or item can be copied from NRS to local computer. Select group or item
to export, and press the button ![]() . Selected
item(s) will appear on the left side of the dialog. Click OK.
. Selected
item(s) will appear on the left side of the dialog. Click OK.
Every catalog group or item transfer includes transfer or all corresponding files. For example, if assembly element group or item is transferred from or to NRS, all gropu /item information will be transferred, along with blocks connected with that item.
Therefore the transfer can last few minutes or more (depending on how many items or groups are to be transferred). The transfer process should not be interrupted until finished – otherwise transfer errors could occur (i.e. items or connected blocks missing).
All users can donwnload catalogs from NR, no matter which access level rights the y have. More about access rights read here.
Whole catalog group can be deleted from NR only by accessing NR from the application, if the user has the administrator access rights.
It can be done this way – open catalogs and click on catalog import or catalog export. Choose destination Network repository.
Select catalog
group on the right part of the dialog – in the NR. Click on the delete
button ![]() .
This command erases chosen gropu permanently from NRS, so be careful using
it.
.
This command erases chosen gropu permanently from NRS, so be careful using
it.
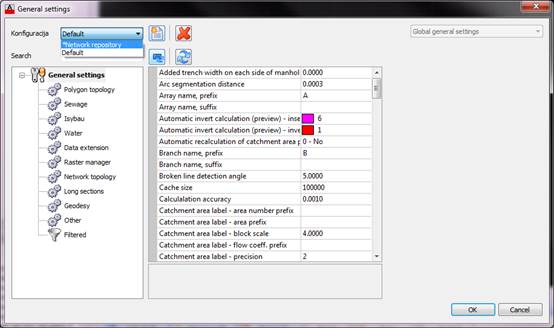
You can upload only one general settings configuration to NRS. If there is general settings configuration saved on NRS, it will be available in the configuration. This way the user can choose whether to use local general settings or those saved on NRS. Default option sets general settings as local. If the user choses to use general settings from SMR, those data will not be saved on the local computer. The configuration copy will be available in RAM, and the data will be user “on the fly”. When the user exit the application, those general settings will not be available any more.
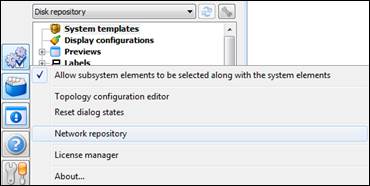
Open Urbano application and select following command:
Following dialog will appear:
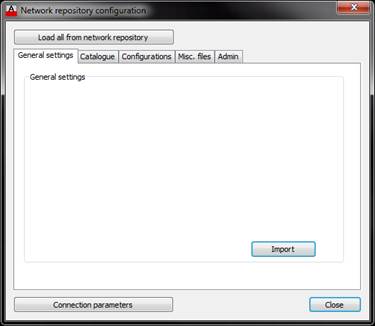
Load all from network repository
All catalogs, configurations, settings and connected elements from NR will be downloaded to the local computer. This command is made for new users to transfer all the data at once, not one by one. This command can take a while.
Connection parameters
This command was explained in Chapter 3.5, the parameters can be changed aritrary. This command is available no matter which tab of the dialog is currently active.
General settings tab
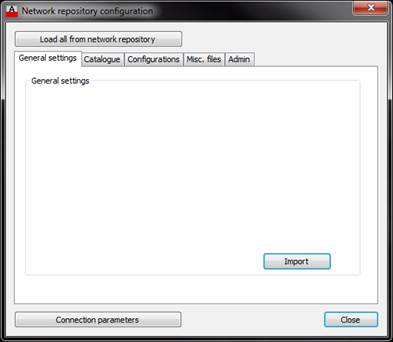
General settings from NRS can be loaded to local computer – to do it, click Import.
|
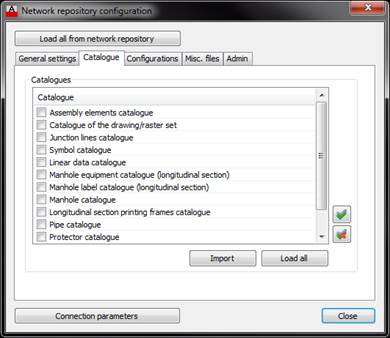
Configuration tab
|
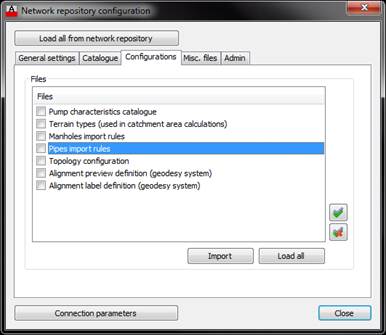
|
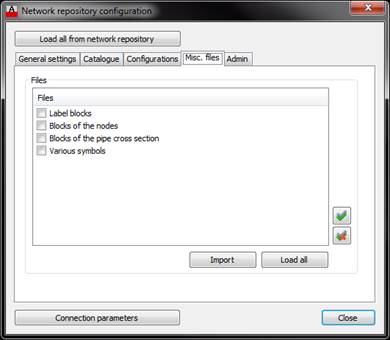
![]() select
all
select
all
![]() unselect
all
unselect
all
Admin tab is decribed in Chapter 3.2.
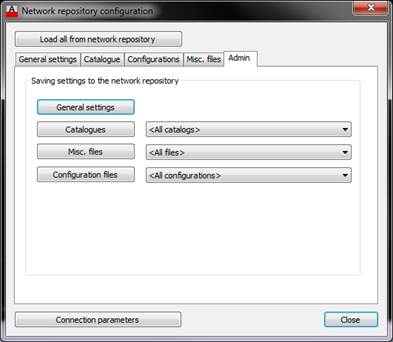
Summary
REMARK: Only the user with the access level “administrator” can see the Admin tab.
During Network repository installation process, installation folder location has to be set. See more in the chapter 2 – Installation.
If the installation was finished according default settings, network repository has been installed in folder C:\Program Files\Studio ARS\RepositoryServer .
Installation file contains following files:
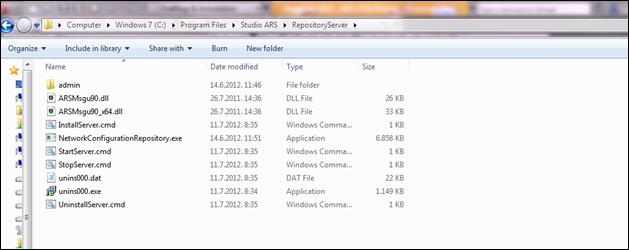
Files with the .cmd extension should be started as administrator and were made to perform following actions:
FILE |
FUNCTION |
InstallServer.cmd |
Installs NRS on the computer |
UninstallServer.cmd |
Deinstalls NRS from the computer |
StartServer.cmd |
Starts NRS Service |
StopServer.cmd |
Stops NRS Service |
Except this folder, NRS installation will generate another one:
C:\ProgramData\StudioARS\RepositoryServer
Since the folder Program Data refers as Windows OS system folder, it is adjusted to be hidden. It is possible to see it whn following option is on (Control Panel – Folder options):
Nevertheless, you don’t have to show hidden folders to be able to access RepositoryServer folder. You can simply type the location C:\ProgramData\StudioARS\RepositoryServer in the Windows Explorer address bar.
Folder RepositoryServer contains two sub-folders:
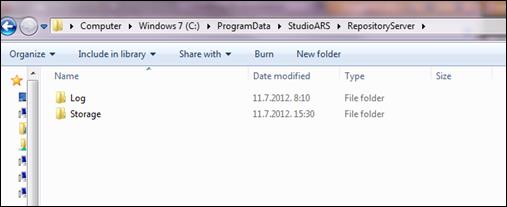
Log – this folder contains textual files that track NRS actions. In the case of problems with work with NRS, you can copy those files and sent it to StudioArs Tehnical support - support@studioars.hr.
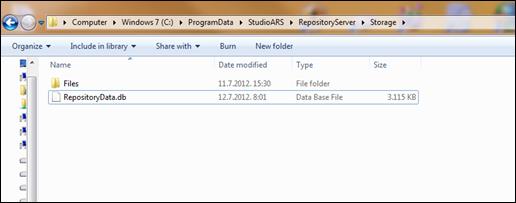
Storage – contains RepositoryData.db – this file is the NRS files database, and folder Files that contains related files.
· Back-up files
Folder Storage (C:\ProgramData\StudioARS\RepositoryServer\Storage) contains folder Files (all related files are stored in this folder – blocks, sybols..) and database file RepositoryData.db that contains the file connections with the items.
Folder Storage should be frequently copied to some other location (or that or another computer) to have back-up up to date.
· Restore back-up files
If the files from Network repository server were erased, corrupted or damaged, you will simply recover network repository. Find back-up folder, copy folder Storage and paste it to the folder C:\ProgramData\StudioARS\RepositoryServer\.
Before you copy back-up files, you should stop the service - StudioARS Repository Server 1.0.
Right-click on the icon My computer – Manage. Following window will appear:
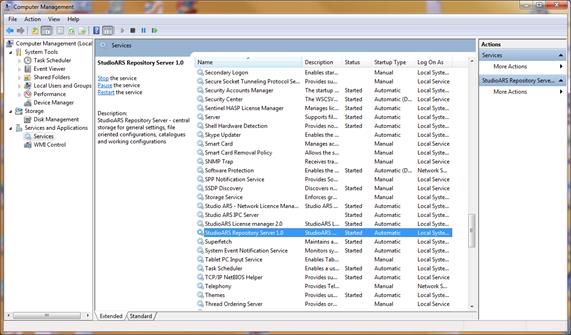
Select Services on the left side of the window and find StudioARS Repository Server 1.0. Right-click on the service – STOP. Don’t exit this window.
After this, copy files from back-up folder Storage (that contains folder Files and file RepositoryData.db) and paste it to the C:\ProgramData\StudioARS\RepositoryServer\. After the files are copied, you have to start the StudioARS Repository Server 1.0 again. Right-click on the service – START. If the back-up file were restored successfully, you will be able to see the files from NRS web interface and from the Urbano application.
REMARK: If the NRS is uninstalled, the data from NRS will be saved in the folder C:\ProgramData\StudioARS\RepositoryServer.
When problems with NRS operations occur, there are few things to check:
If the connection settings are not correct, the connection will not be established.
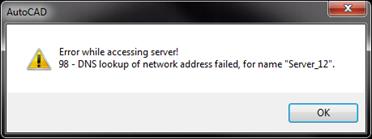
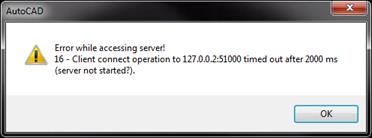
If the computer is connected to the local network, it is enough to type server name. If not, server IP address has to be set.
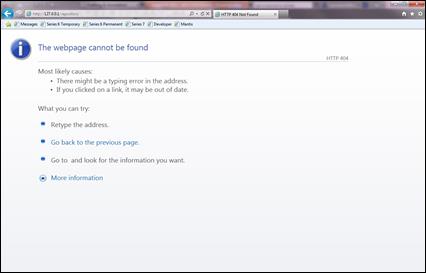
If NRS web page can’t be found, it is possible that the service has been stopped. Check the service -> Control Panel – Administrative Tools – Services (you can access it by right-click -> My Computer – Manage - Services):
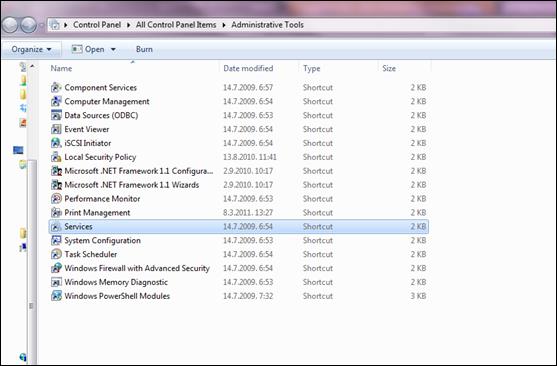
Find NRS service - StudioARS Repository Server 1.0:
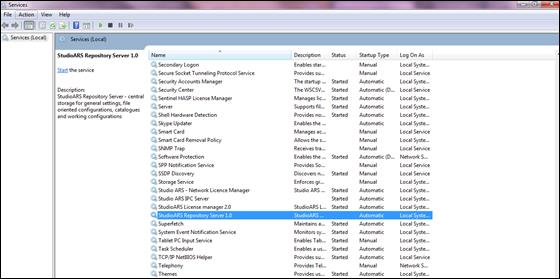
If the status is not Started, the service wasn’t started automatically. Start it by right-clcik – Start :
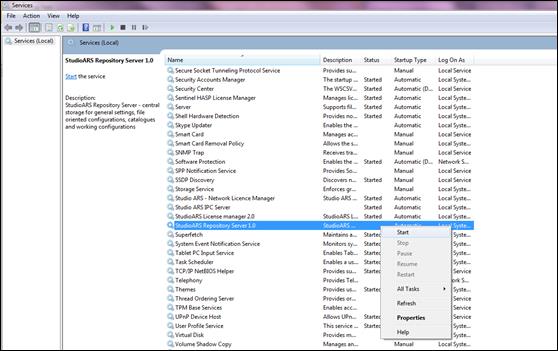
After this action, try to access NRS via web browser again.
If this action didn’t help (you can’t access NRS), open folder C:\Program Files\Studio ARS\RepositoryServer. It is NRS installation folder. StartServer.cmd starts the service, StopServer.cmd stops the service. You can read more about services in chapter 5.
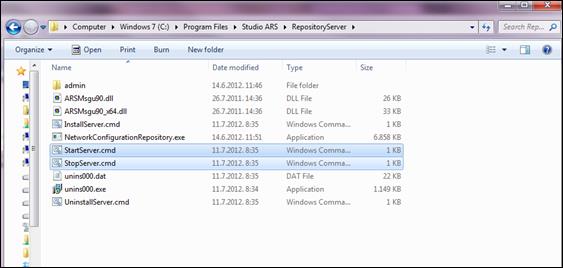
Right-click on StopServer.cmd, run as administrator (stops the service). Afer that right-click on StartServer.cmd, run as administrator (starts the service).
If there is still a problem to access NRS via web browser, it is possible that some program stops this service. It can be the antivirus program or Firewall. Check Firewal settings, try to disable firewall and access NRS again. Try the same with the antivirus program. If you don’t have the rights to do it, talk to the network administrator.
REMARK: When NRS installs on the computer, default communication port between NRS and Urbano application is port 51000 (TCP) , and the default port for the communication with the Web browser is port 64738.
Both ports should be open so the NRS could work properly.
When some other application communicates via same port as NRS, following message will appear:
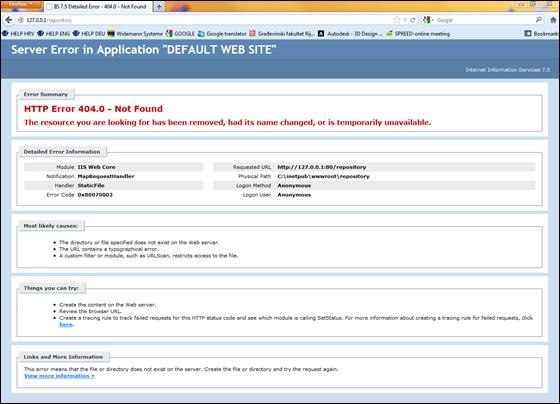
In this case, communication port with web browser should be changed. Read here how to change connection parameters chapter 3.4.